

Table of Contents
- What You'll Need Before Starting
- Understanding Bike Trailer Hitch Compatibility
- How to Attach Bike Trailer Hitch to Standard Quick-Release Axles
- Installing Bike Trailer Hitch on Thru-Axle Systems
- Bike Trailer Safety Strap Installation
- Connecting the Trailer Arm and Coupler
- Common Installation Mistakes to Avoid
- Safety Checks and Testing Before Your First Ride
- Frequently Asked Questions
Last Updated: September 21, 2026
What You'll Need Before Starting
Before you attach a bike trailer hitch, gather a wrench (usually 15mm or 17mm), washers, an axle nut, and optionally a torque wrench. Identify your rear axle type: quick-release skewers (most standard bikes) or thru-axles (newer bikes, especially mountain and e-bikes).
Essential tools and parts:
- Appropriately sized wrench
- Washers (typically included with hitch)
- Axle nut
- Torque wrench (optional but recommended)
- Bike trailer hitch compatible with your axle type
- Safety strap (comes with most hitches)
Booyah Strollers offers two main hitch options: the standard 11mm hitch for most traditional bikes, and the 15mm hitch for e-bikes with larger axle bolts.

Understanding Bike Trailer Hitch Compatibility
Compatibility is critical: your bike's rear hub design, axle type, frame material, and motor system (if e-bike) determine whether a hitch will work safely and avoid frame damage or warranty voidance.
Axle type: Quick-release vs. thru-axle:
Quick-release skewers use a lever to clamp the wheel without tools. The axle bolt diameter is typically 9mm or 11mm, and quick-release hitches are straightforward to install.
Thru-axle systems are standard on modern bikes, especially mountain bikes, gravel bikes, and e-bikes. The bolt diameter is usually 12mm or 15mm. Thru-axle hitches require a compatible adapter matching your specific axle size and pitch; installing without the correct adapter creates a loose, unsafe connection.
Carbon fiber frame compatibility and safety concerns:
Steel and aluminum frame compatibility:
E-bike hub motor interference:
Dropout design and hitch clearance:
How to verify compatibility before purchase:
-
Identify your axle type and size. Check your bike's manual or measure the thru-axle bolt diameter (12mm, 15mm, or 20mm) and pitch (usually 1.5mm). For quick-release bikes, measure the axle bolt diameter (usually 9mm or 11mm).
-
Check your frame material and manufacturer guidelines. Look up your frame manufacturer's website or manual for any restrictions on trailer attachment, weight limits, or recommended hitch types.
-
Confirm hub motor compatibility (if e-bike). Contact your motor manufacturer and bike maker to confirm that a hitch is safe to install on your specific motor and frame combination.
-
Purchase a hitch with the correct adapter. If you have a thru-axle bike, ensure the hitch comes with an adapter that matches your axle size and pitch.
How to Attach Bike Trailer Hitch to Standard Quick-Release Axles
Attaching a hitch to a quick-release axle takes about 10-15 minutes and is the most common installation type.
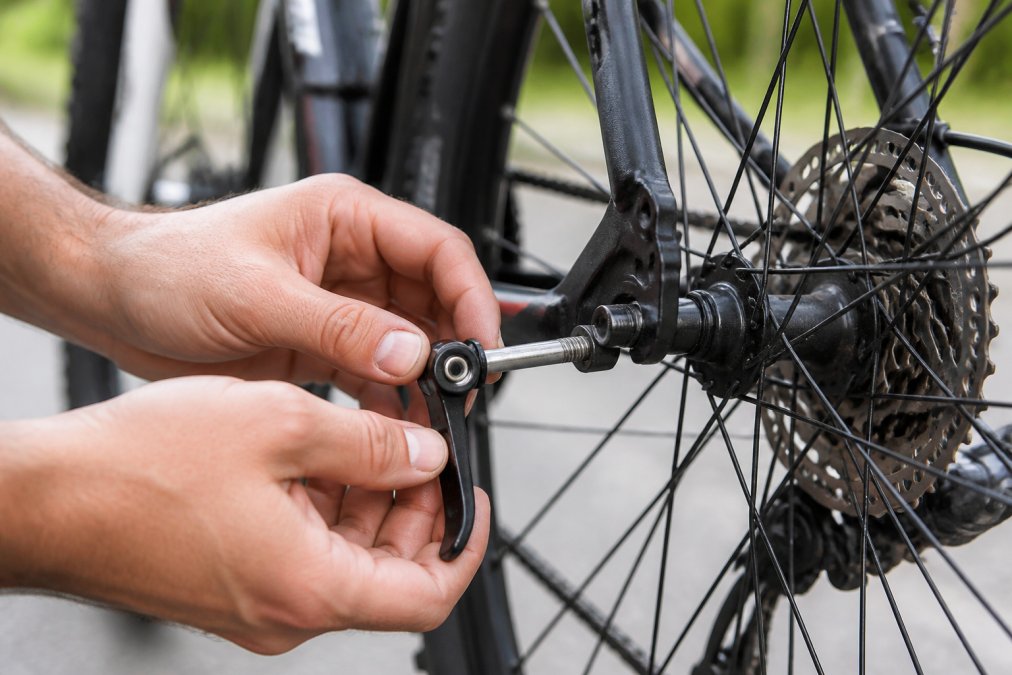
Step 1: Remove the Quick-Release Skewer
Open the quick-release lever on your rear wheel and turn it counterclockwise until it comes free. Pull the skewer completely out and set it aside safely. Inspect the axle bolt and clean away any dirt or debris.
Step 2: Position the Hitch and Insert the Bolt
Align the hitch arm with the dropout and slide the hitch onto the axle. It should sit flush against the dropout without gaps. Insert the axle bolt through the hitch, ensuring it slides smoothly. Position any washers that came with your hitch to distribute pressure and prevent the bolt from pulling through.
Step 3: Secure with Washers and Axle Nut
Thread the axle nut onto the bolt by hand first, tightening it finger-tight. Add washers if your hitch kit includes them to distribute clamping force evenly. Once hand-tight, use your wrench to tighten further, turning clockwise steadily until you feel resistance.
Step 4: Tighten to Proper Torque Specifications
Use a torque wrench if you have one. Most bike axle bolts need 10-15 foot-pounds of torque; check your bike's manual for exact specifications. Tighten in small increments and check alignment between each one. Test the hitch by hand, grab the hitch arm and try to move it side to side. There should be zero play.
Installing Bike Trailer Hitch on Thru-Axle Systems
Thru-axle installation is more complex than quick-release because modern bikes use varying standards requiring specific adapters.
Standard Rounded Angled Bike Hitch. 11 →
Understanding thru-axle standards and adapter requirements:
Thru-axles come in multiple diameters and thread pitches. Your hitch must come with an adapter matching your specific axle size. Without the correct adapter, the hitch will fit loosely and create dangerous play. Confirm your axle diameter and pitch by checking your bike's manual or measuring the bolt.
E-bike hub motor complications:
Step-by-step thru-axle installation:
Step 1: Remove the thru-axle bolt completely. Use the correct tool, usually a 6mm Allen wrench for most thru-axles. Turn counterclockwise and slide the bolt out from one side (typically the non-drive side, which is the left side when viewing the bike from behind). Keep the bolt in a safe place.
Step 2: Select and inspect the correct adapter. Lay out the adapter that came with your hitch. The adapter should have external threads that match your thru-axle pitch and internal threads that accept the thru-axle bolt. Inspect the adapter for any damage or debris and clean if necessary.
Step 3: Thread the adapter onto the hitch socket. Turn it clockwise by hand until it is snug. Do not use a wrench yet; hand-tightening ensures you don't cross-thread. The adapter should sit flush with the hitch socket with no gaps.
Step 4: Insert the hitch assembly into the dropout. Align the hitch arm so it sits parallel to the ground and centered on the rear axle. Slide the entire assembly into the dropout with the adapter's external threads facing outward.
Step 5: Insert the thru-axle bolt through the adapter. Slide the original thru-axle bolt through the adapter and into the hub. It should slide smoothly without forcing. If it binds, check that the adapter is threaded straight into the socket.
Step 6: Tighten the thru-axle to specification. Once the bolt is fully inserted and threaded into the hub on the opposite side, tighten it according to your bike's manual. Most thru-axles require 10-20 foot-pounds of torque. Tighten in small increments and check hitch alignment between each adjustment. The hitch should remain parallel to the ground and centered on the bike.
Step 7: Verify the hitch is secure. Grab the hitch arm and try to move it side to side. There should be zero play. If it wiggles, the adapter may not be fully threaded into the socket, or the thru-axle may not be tight enough. Loosen the thru-axle slightly, reseat the adapter, and tighten again.
Common thru-axle installation mistakes:
Bike Trailer Safety Strap Installation
The safety strap is your backup connection and prevents trailer detachment if the hitch fails. Locate the attachment point on your hitch, route it around your seat post, and secure it using the provided method. The strap should be snug but not tight, with 2-3 inches of slack so it only engages if the main hitch fails. Install it every time you attach the trailer and check it before each ride.
Connecting the Trailer Arm and Coupler
The trailer arm connects your bike to the trailer itself. Booyah Strollers' [Bike Bicycle Trailer Arm and Coupler(/products/bike-bicycle-trailer-arm-and-coupler) | booyahstrollers.com] includes everything you need for this connection. It comes with the arm, coupler, cotter pins, safety strap, and black plastic sleeve.
Common Installation Mistakes to Avoid
Skipping the safety strap is the most dangerous mistake. Over-tightening the axle nut strips threads and cracks dropouts; use a torque wrench. Using the wrong hitch size causes poor fit and wobbling. Misaligning the hitch makes the trailer pull to one side; keep the arm parallel and centered. Ignoring frame compatibility can damage carbon fiber bikes; check your bike's manual. Not checking rear wheel clearance causes rubbing; ensure at least 6 inches of clearance.
Safety Checks and Testing Before Your First Ride
Perform these checks before every ride. Hitches can loosen over time, so regular inspection keeps everything safe.
Frequently Asked Questions
How do I know if a bike trailer hitch is compatible with my bike?
Check your rear hub's axle bolt diameter, most standard bikes use 9.5 mm or 10 mm bolts. Booyah Strollers offers the Standard Rounded Angled Bike Hitch with an 11 mm hole for most bikes, and a 15 mm hitch for e-bikes with larger axle bolts. Measure your axle bolt before purchasing. Also verify your frame has a rear dropout that can accommodate the hitch arm without interference from the rear tire or frame.
Can I attach a bike trailer hitch to a bike with thru-axles?
Yes, but thru-axle bikes require an adapter. Unlike quick-release systems, thru-axles use a threaded shaft that runs completely through the hub.
What is the purpose of the safety strap on a bike trailer hitch?
The safety strap serves as a backup attachment point that prevents the trailer from completely separating if the primary hitch connection fails. It should be installed as a secondary restraint between the hitch arm and the bike frame or seat post. Always inspect the safety strap for wear before each ride, and ensure it's taut but not so tight it restricts movement of the hitch arm.
Do I need special tools to install a bike trailer hitch?
You'll need a wrench that fits your axle bolt (typically 15 mm or 17 mm), and optionally a torque wrench to set proper tightness specifications. Most installations can be completed with basic hand tools you likely already own. Booyah Strollers' Bike Bicycle Trailer Arm and Coupler includes the hitch arm, coupler, cotter pins, safety strap, and plastic sleeve, which is purchased separately based on your bike's axle type.